
The techSHIP Desktop Client supports Scan-and-Go workflows by connecting your workstation to techSHIP and your local printing devices.
This guide covers how to install the latest available version, configure your Connection settings, select your Location, and resolve common connection issues.
TABLE OF CONTENTS
- Before You Begin
- Install the techSHIP Desktop Client
- Connect the techSHIP Desktop Client
- Configure Optional Devices
- Troubleshoot Connection Issues
Before You Begin
Before you begin, make sure you have the latest available version of the techSHIP Desktop Client, your techSHIP Username, an API Key, and access to the Location you want to use.
 | The API Secret field in the Desktop Client uses the API Key associated with your techSHIP user account. To copy or rotate your key, refer to How to Get Your API Key for the techSHIP Desktop Client [Guide]. | |
| | ||
Install the techSHIP Desktop Client
Open the official techSHIP Desktop Client installer by clicking on the provided link (http://files.techship.io/Techship.Desktop/publish.htm), and make sure you are installing the latest available version.
 | From the installer page, select Launch if the required Microsoft .NET Framework is already installed, or |
 | Select Install if the required prerequisites also need to be installed. |
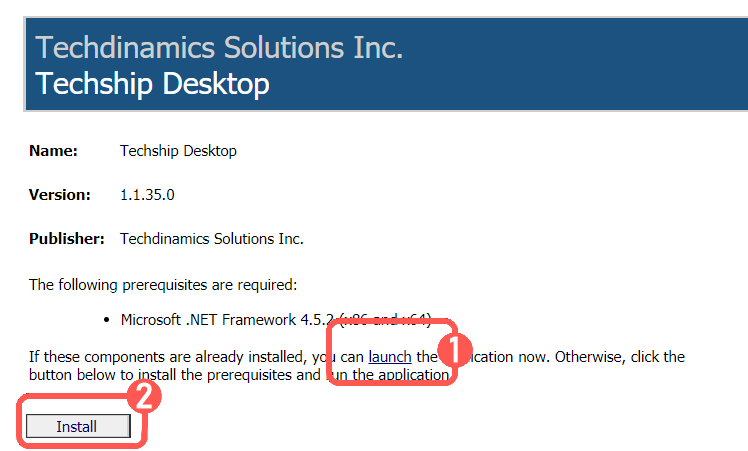
 | Open the downloaded Techship.Desktop.application or Setup.exe file, depending on the installation option you selected. |
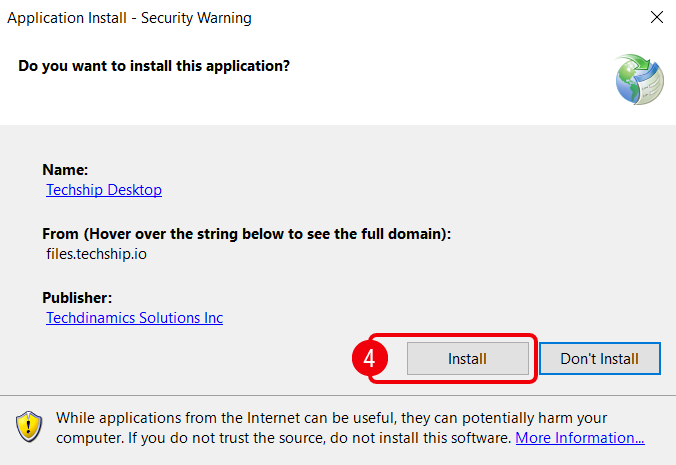
 | When the installation prompt appears, select Install to continue. |
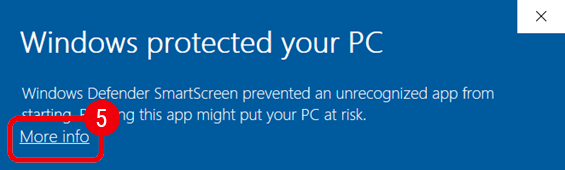
 | If Windows displays a security prompt for the official techSHIP Desktop Client installer, review the publisher information before using the available Windows security options to continue. |
The techSHIP Desktop Client is now installed on your workstation. Next, open the application and configure your Connection settings.
Connect the techSHIP Desktop Client
Open the techSHIP Desktop Client and:
| Click Settings and then select Connection from the left panel. |
| Set the following fields: |
- In Connection name, enter the name you want to use for this workstation or station.
- Open Region and select the region associated with your techSHIP environment.
- In Username, enter your techSHIP username.
- In API Secret, paste the API Key associated with that Username. If you need to obtain the key, refer to How to Get Your API Key for the techSHIP Desktop Client [Guide].
- Open Location. A loading indicator appears while the Desktop Client retrieves the active locations available to the supplied credentials. Select the appropriate Location from the list. If your credentials provide access to only one Location, it is selected automatically.
| Click Save to apply the connection settings. |
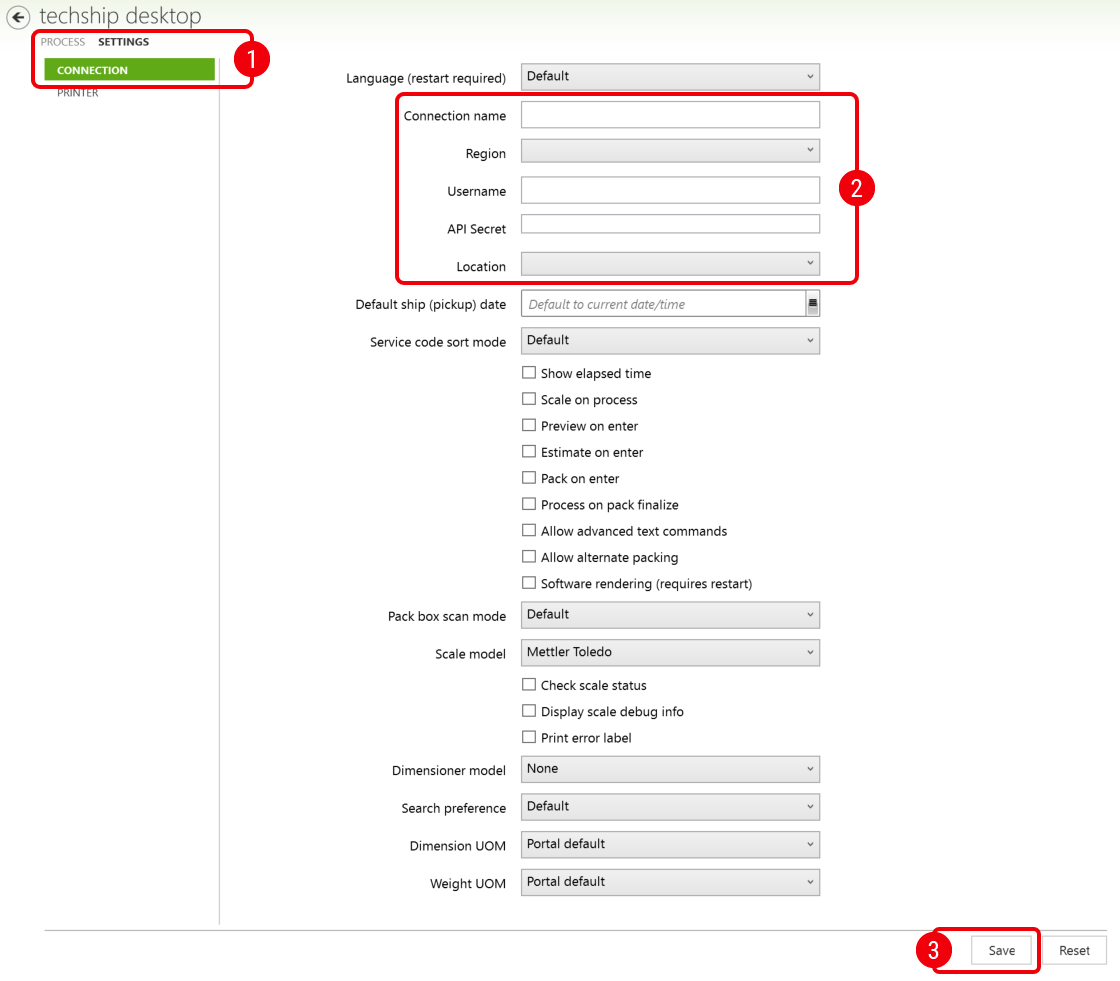
Your Connection settings are now saved with the selected Region and Location. Next, configure any required local devices or return to Process to begin using the Desktop Client.
Configure Optional Devices
| If you use a scale, select the appropriate device from Scale model. |
| If you use a dimensioner, select the appropriate device from Dimensioner model. |
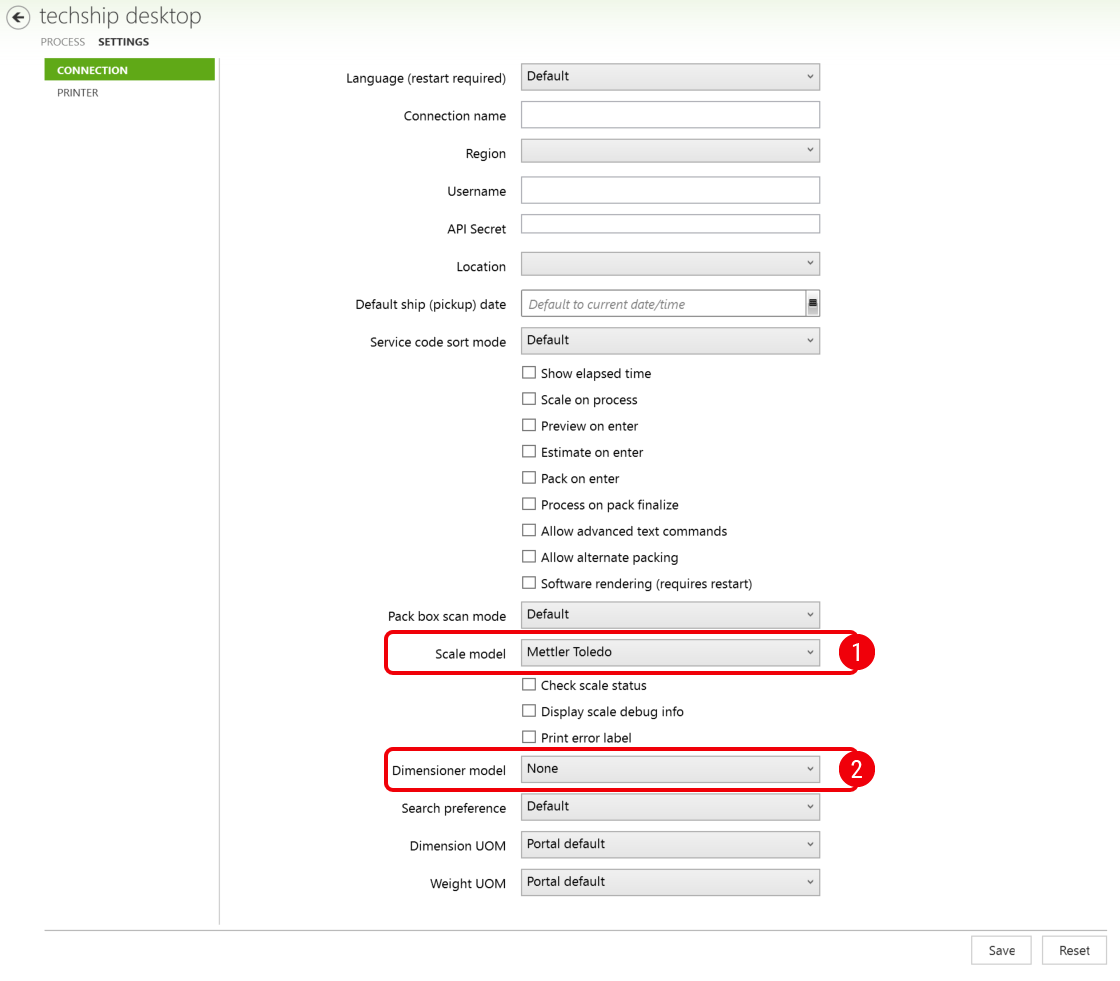
| Select Printer from the left panel. |
| Choose your Thermal Printer for shipping labels. |
| If you print documents such as packing slips on a laser or inkjet printer, select the appropriate Generic Printer. |
 | Select Save after you finish configuring your local devices. |
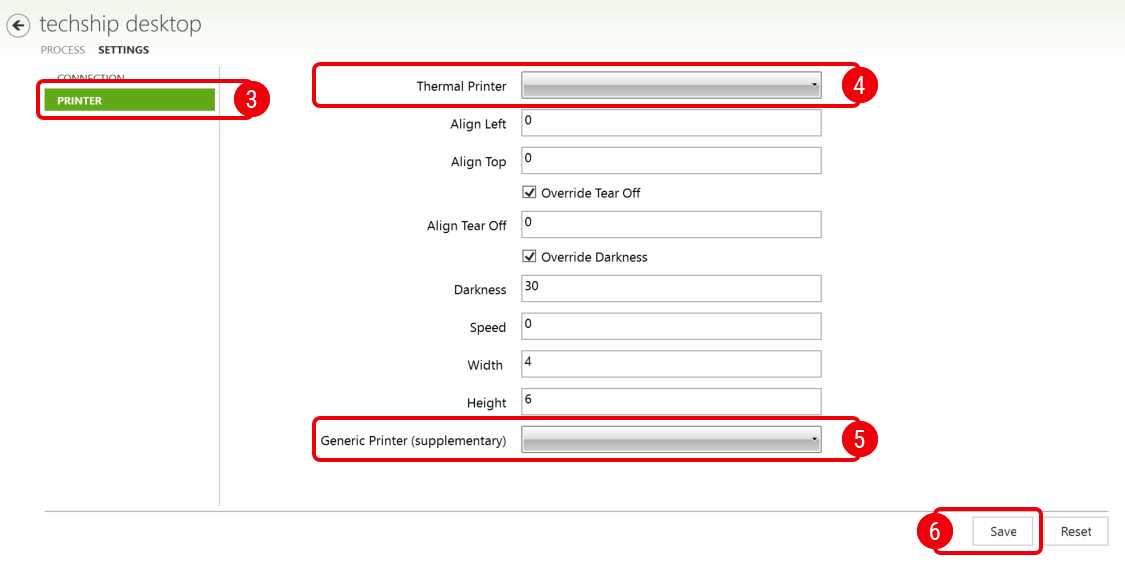
Your required local devices are now configured. You can return to Process and use the Desktop Client with your saved connection.
Troubleshoot Connection Issues
- If you see Check the highlighted fields., complete the required Region, Username, API Secret, and Location settings before saving again.
- If you see Username or API key is incorrect., verify your Username and the API Key entered in API Secret. If necessary, retrieve the correct key from How to Get Your API Key for the techSHIP Desktop Client [Guide].
- If you see No locations found for these credentials in this region., verify the selected Region and your credentials. If you expect access to a location, confirm that your techSHIP account has access to it.
- If you see Couldn't load locations., open Location again to retry the request. If the issue continues, contact techSHIP Support for additional review.
- If an expected Location disappears after you edit Region, Username, or API Secret, open Location again because changing any of those settings clears the previously loaded selection.
After correcting the applicable Connection setting, select or reload your Location and select Save again.