
Use Support to report an issue from the page where it occurs or to collect information that another person can use to create the ticket for you. Your available Support experience depends on whether you have the required permissions to create support tickets.
This guide explains how you copy and share support context, create a support ticket, use context received from another person, and recognize the outcome of a ticket submission.
 | The screenshots in this article show techSHIP and are provided as visual examples to guide you through the workflow. The same Support workflow applies to other Techdinamics products, although the surrounding interface may differ. | |
| | ||
| The exact permission required to create support tickets depends on the product. Refer to the corresponding permissions documentation to confirm the required access: | |
| | ||
TABLE OF CONTENTS
- Support Access and Availability
- Copy and Share Support Context
- Create a Support Ticket
- Submit and Confirm Your Ticket
- Continue to the Support Portal
Support Access and Availability
When you open the floating Support control, you receive one of two experiences:
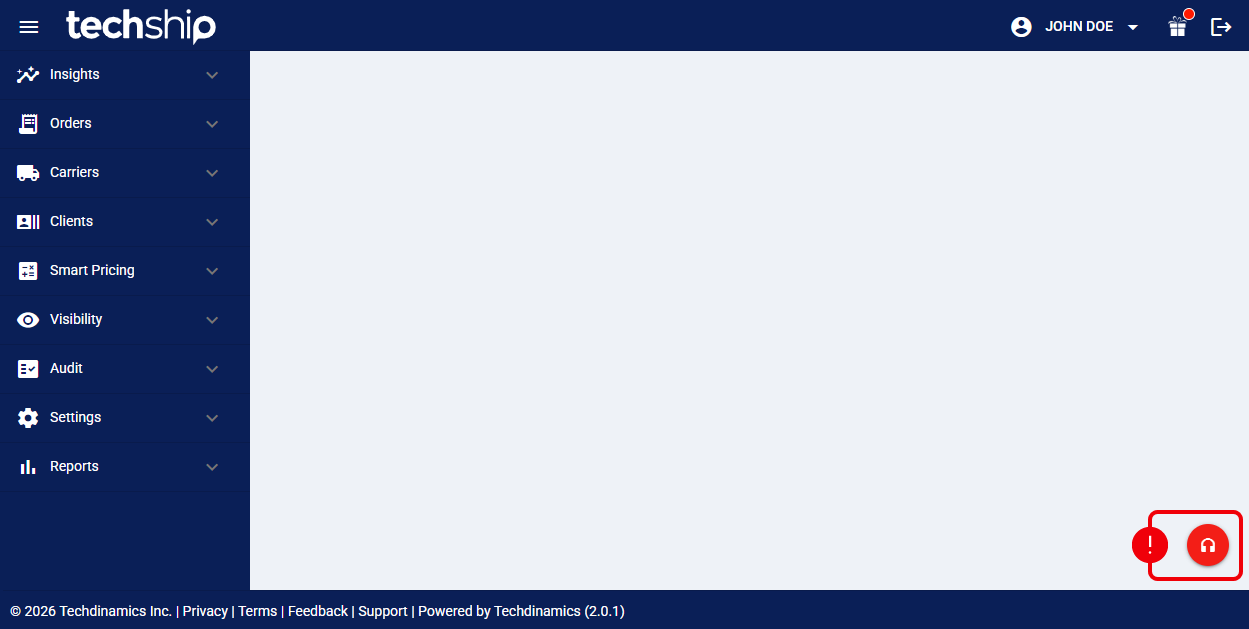
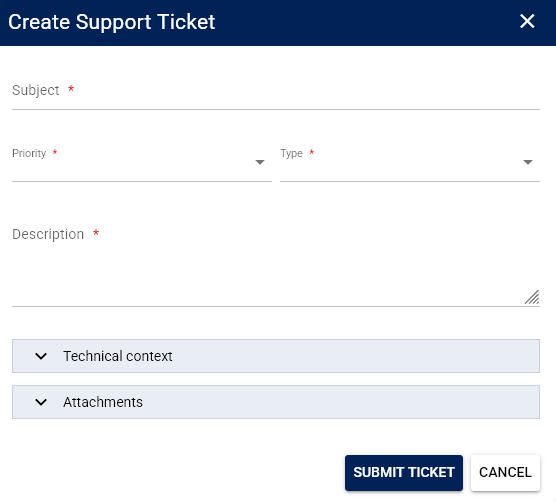
- If you have the required permissions to create support tickets, Create Support Ticket opens so you can create and submit a request directly.
- If you do not have the required permissions to create support tickets, Support Context opens so you can review and copy information related to the issue. You can then share that information with someone who can create the ticket for you.
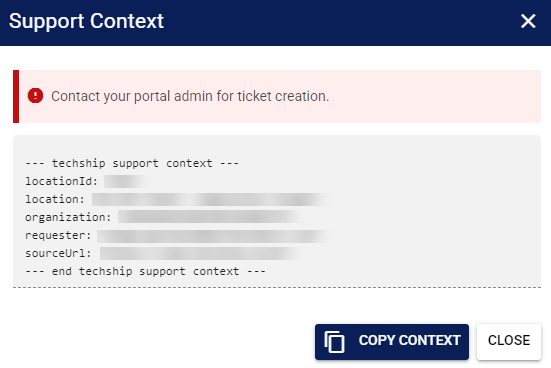
Support context is information available about the current page and issue that can help another person understand and investigate the problem. The information included can vary depending on where you open Support.
| Copy Context copies the available information so you can share it yourself. It does not create a ticket, send the information to Support, or notify another person. | |
| | ||
| A separate Support link in the footer may be available. When this is the case, it opens the external Support Portal. This footer entry point is separate from the floating Support control described in this guide. For the location of the footer link in techSHIP, refer to Exploring the New techSHIP User Interface (UI) [Guide]. | |
| | ||
Copy and Share Support Context
If you cannot create a ticket yourself, use Copy Context from the page related to the issue and send the complete copied information to someone who has the required permissions to create support tickets.
 | Open the application page related to the issue and select Support. |

 | Select Copy Context. |
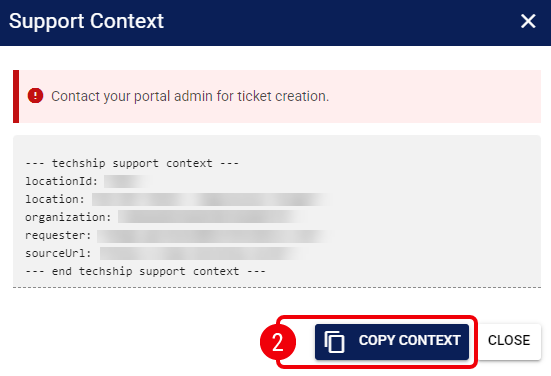
 | Paste and send the complete copied context block to someone who can create support tickets. |

The other person now has the available support context, but no ticket has been created yet. Ask them to open Support and follow the steps in Create a Ticket Using Context Received from Another User below.
| If an Error status or another error-detail control is available for the issue, open Support from the page related to the problem when you want to create or prepare a support request. | |
| | ||
Create a Support Ticket
You can create a ticket directly from Support when you have the required permissions to create support tickets.
| Open the page related to the issue and select Support. |

 | Complete the required fields: |
- Subject: Enter a short title that identifies the issue.
- Priority: Select the appropriate priority. This field is is initially set to Medium.
- Type: Select the appropriate request type. This field is is initially set to Incident.
- Description: Explain the problem or request clearly
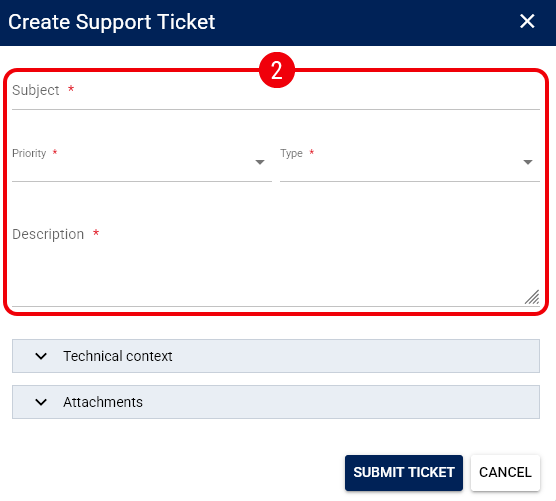
Technical Context is read-only information collected from the current application context. It is separate from the Description, which you provide to explain what happened, what you expected, and any other information needed to understand the issue.
When the required fields contain the correct information and you have reviewed Technical Context, you can add supporting files if necessary and then submit the ticket.
Add Supporting Attachments
Use Attachments when a file can help explain or demonstrate the issue.
- You can attach PNG, JPEG, PDF, plain-text, and CSV files.
- Each attachment can be up to 10 MB per file.
- You can add supporting files by using the available Attachments file picker or Browse action.
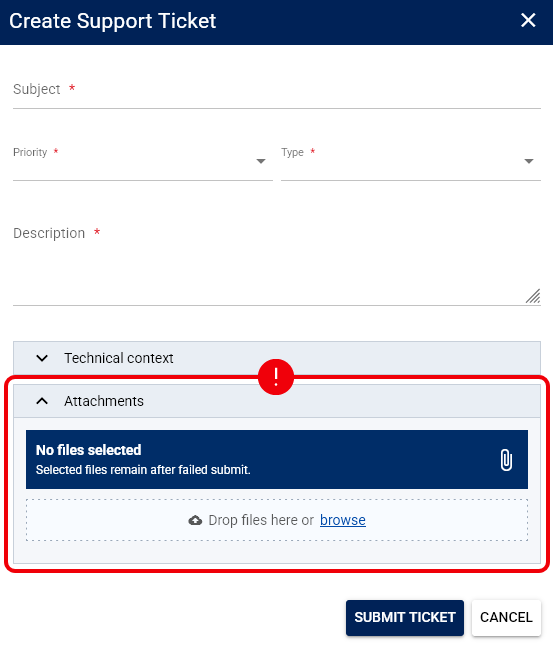
If an attachment exceeds the 10 MB limit or uses a file type that is not accepted, the form identifies the affected file so you can correct it before submitting.
After all selected attachments pass validation, continue with the ticket submission steps below.
Create a Ticket Using Context Received from Another User
If another person sends you support context because they cannot create a ticket, you can apply that information to the Create Support Ticket form.
| Open Support. |

 | Paste the complete context block you received into Description. Confirm that the recognized context is removed from the visible Description, Technical Context expands, and Context applied appears. |
 | Complete the remaining Description with a meaningful explanation of the actual problem, and review the other required fields before submitting. |
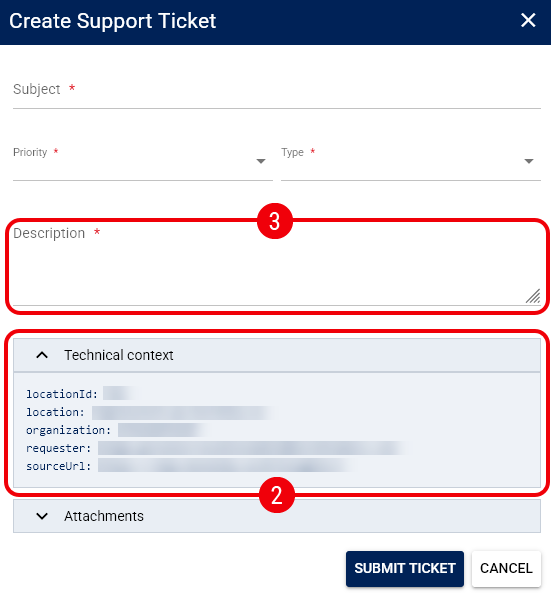
Any explanatory text outside the recognized context block remains in Description. Applying Technical Context does not replace the need for a clear description of the issue.
The received context is now included as Technical Context, and your own explanation remains in Description. Continue with the same submission process used for any other ticket.
Submit and Confirm Your Ticket
Before submitting, review the required fields, any selected attachments, and the available Technical Context.
Submit the completed Create Support Ticket form by clicking on Submit Ticket.
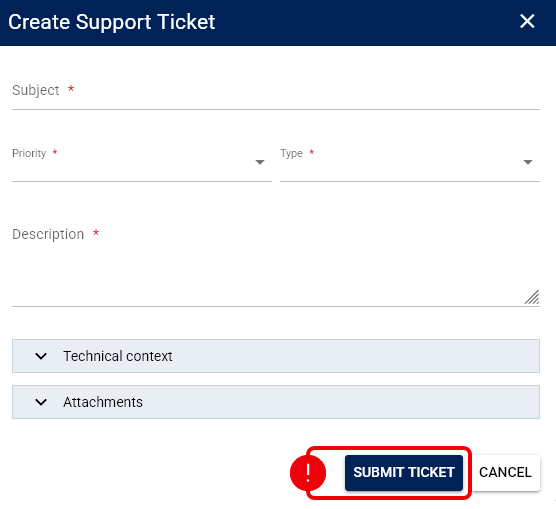
While the request is being submitted, wait for the current submission to complete. If processing takes longer than usual, the form displays “Still submitting, this is taking a little longer than usual.”
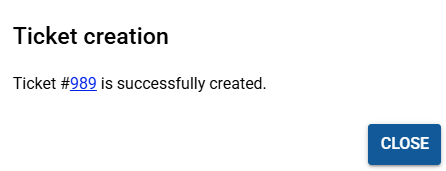
When submission completes successfully, the form closes and a confirmation provides the returned ticket reference and ticket link. Use that link when you want to continue to the external support experience.
Retry a Failed Submission
If ticket creation fails, the information you entered and your selected attachments remain available in the current form so you can correct the issue and retry.
Review the displayed error, make any necessary corrections, and submit the ticket again.
| The preserved information applies to a failed submission in the current form. Do not rely on the form as a saved draft after closing it, navigating away, or ending your session. | |
| | ||
After the retry succeeds, use the returned ticket reference and ticket link to continue with your support request.
Continue to the Support Portal
After successful ticket creation, use the returned ticket link to open the corresponding external support destination. The in-application procedure ends when you follow that link.