
The Pickup Schedule calendar allows you to manually define when carriers arrive at your facility. By setting up weekly routines and date-specific exceptions, you ensure techSHIP always has the most accurate operational data to manage your outbound shipments.
This guide covers how to navigate the calendar, filter carrier visibility, configure recurring weekly pickups, and create one-off schedule exceptions.
 | For detailed conceptual information on how these schedules calculate actual induction dates, refer to Understanding the Centralized Pickup Schedule & Expected Induction Logic [Information]. | |
| | ||
TABLE OF CONTENTS
- Navigating the Pickup Schedule Calendar
- Adding a Recurring Pickup Schedule
- Creating One-Off Exceptions
- Canceling, Rescheduling, or Restoring Pickups
- Using the AI Assistant for Schedules & Exceptions
Navigating the Pickup Schedule Calendar
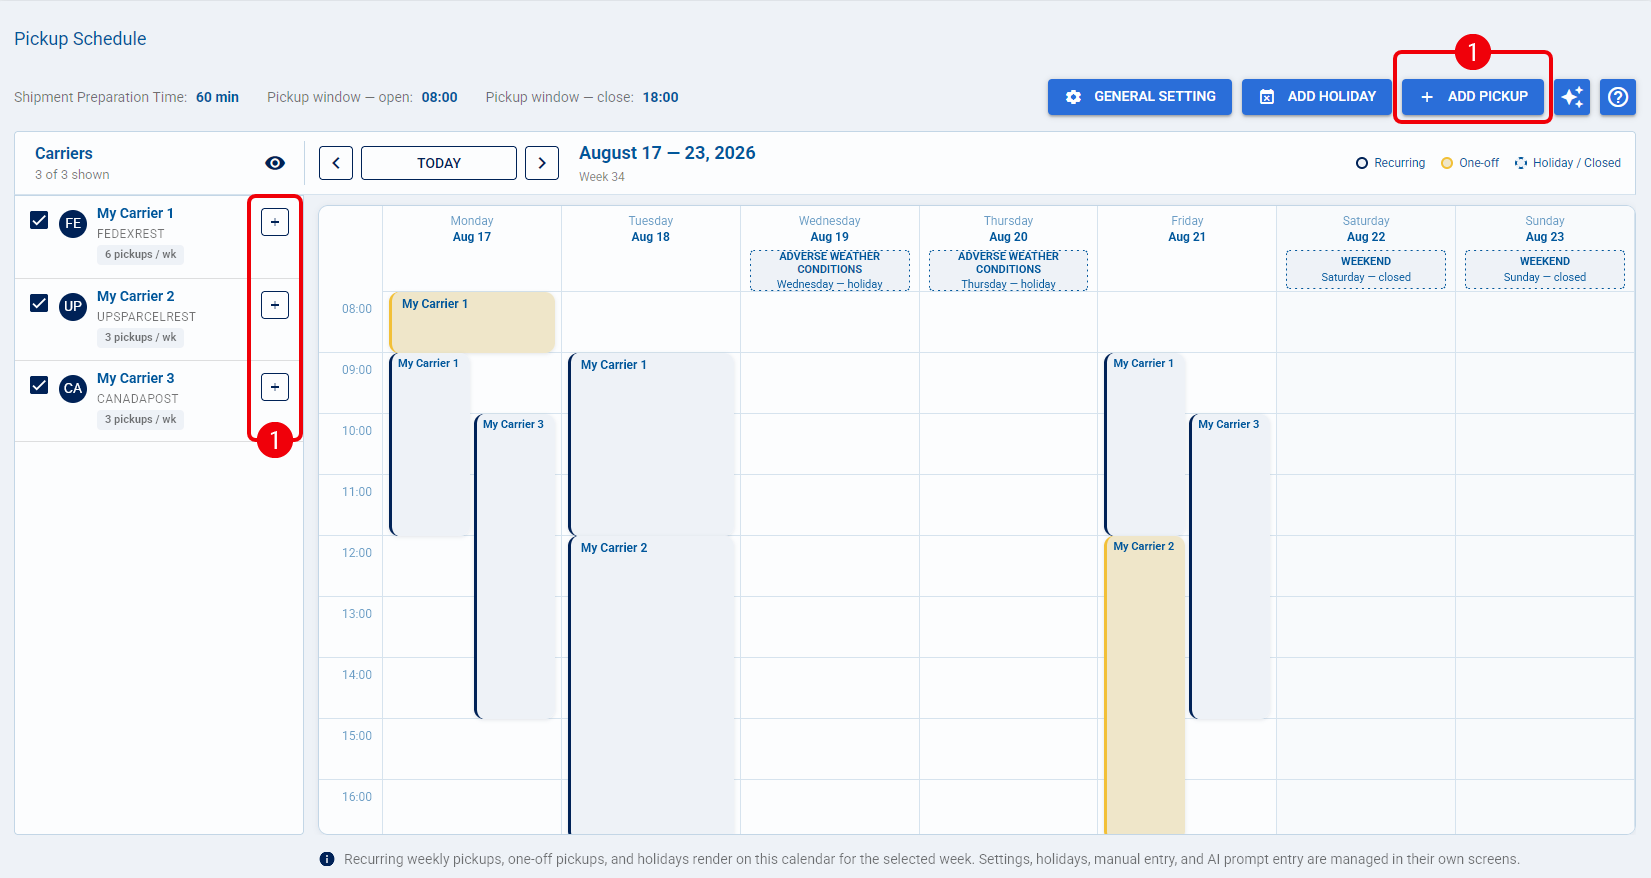
To access the calendar, navigate to the Carriers menu and select Pickup Schedule.
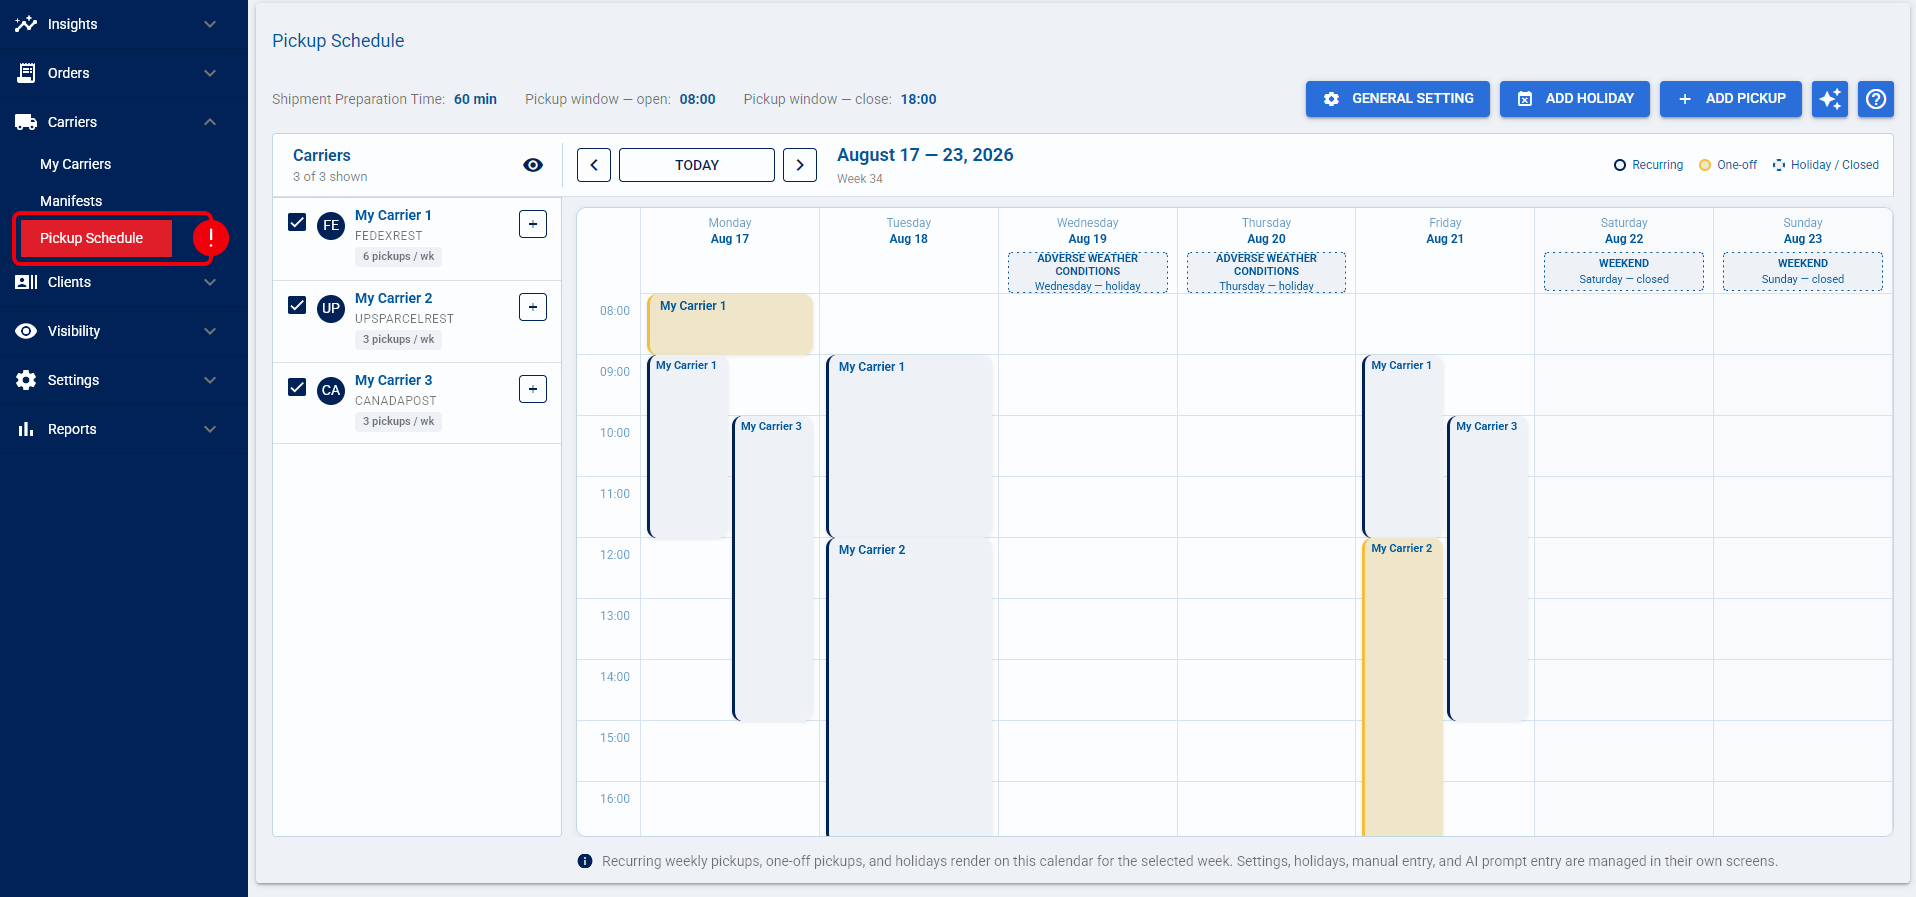
From this dashboard, you can view your current week and use the Date arrows to navigate week-by-week.
| If any active Carriers are missing a configured schedule, techSHIP prominently displays a Warning Banner at the top of the page to alert you to the missing configuration.
| |
| | ||

Managing Carrier Visibility
The left-hand column displays the active Carriers for your location. You can customize this view to focus exactly on what you need to manage:
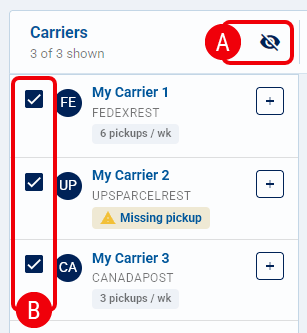
 | Reveal Unscheduled Carriers: Click the visibility icon at the top of the list to display any active Carriers that currently lack a scheduled pickup for the current week. |
 | Filter Calendar Grid: Use the checkboxes next to each Carrier name to show or hide their specific pickup blocks on the main calendar view. |
Calendar Visual Indicators
The main Calendar grid uses specific colors and styles to represent the status of each scheduled event, supported by a visual legend at the top of the grid:
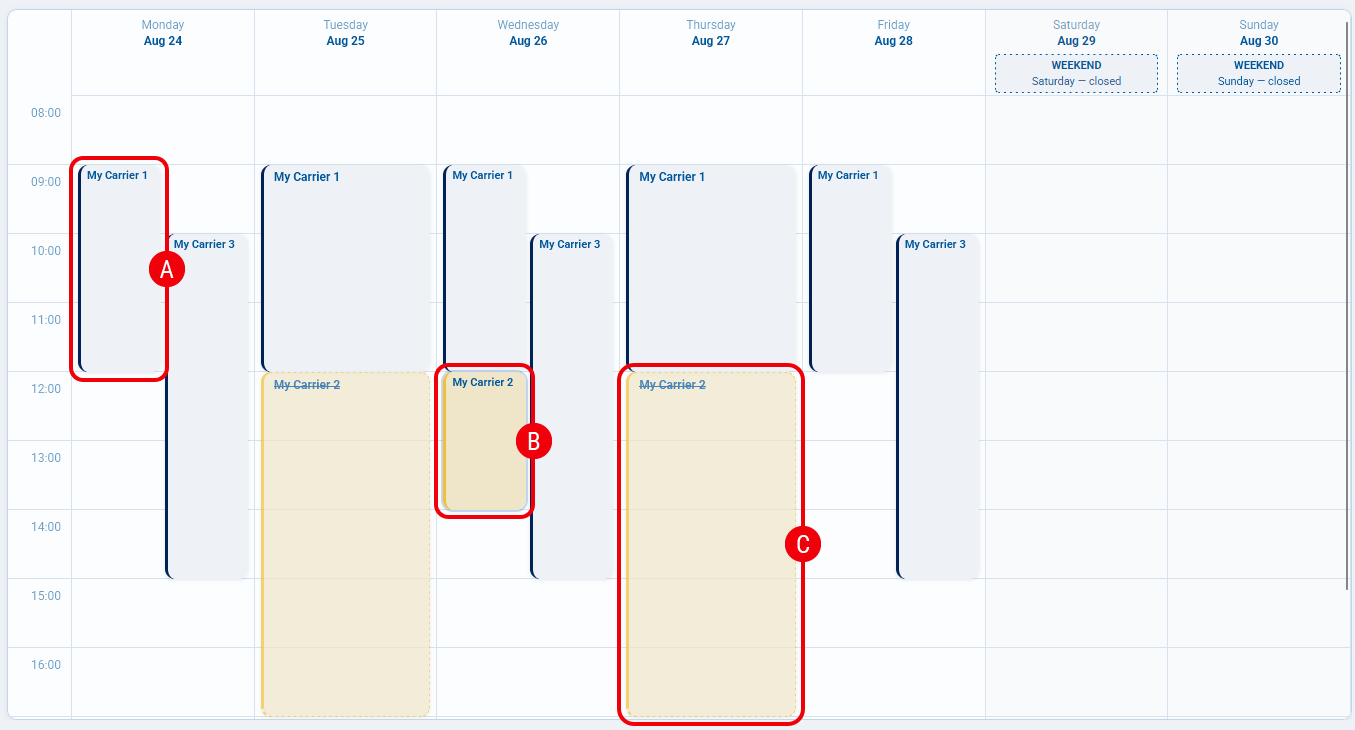
| Standard: Active recurring pickups are displayed as solid blue blocks. |
| One-Off: Manual overrides appear as yellow blocks to stand out from the routine schedule. |
 | Canceled: Any recurring pickup that has been skipped or deleted for a specific day is crossed out and highlighted in yellow. |
Adding a Recurring Pickup Schedule
Follow these steps to define the standard weekly routine for a specific Carrier.
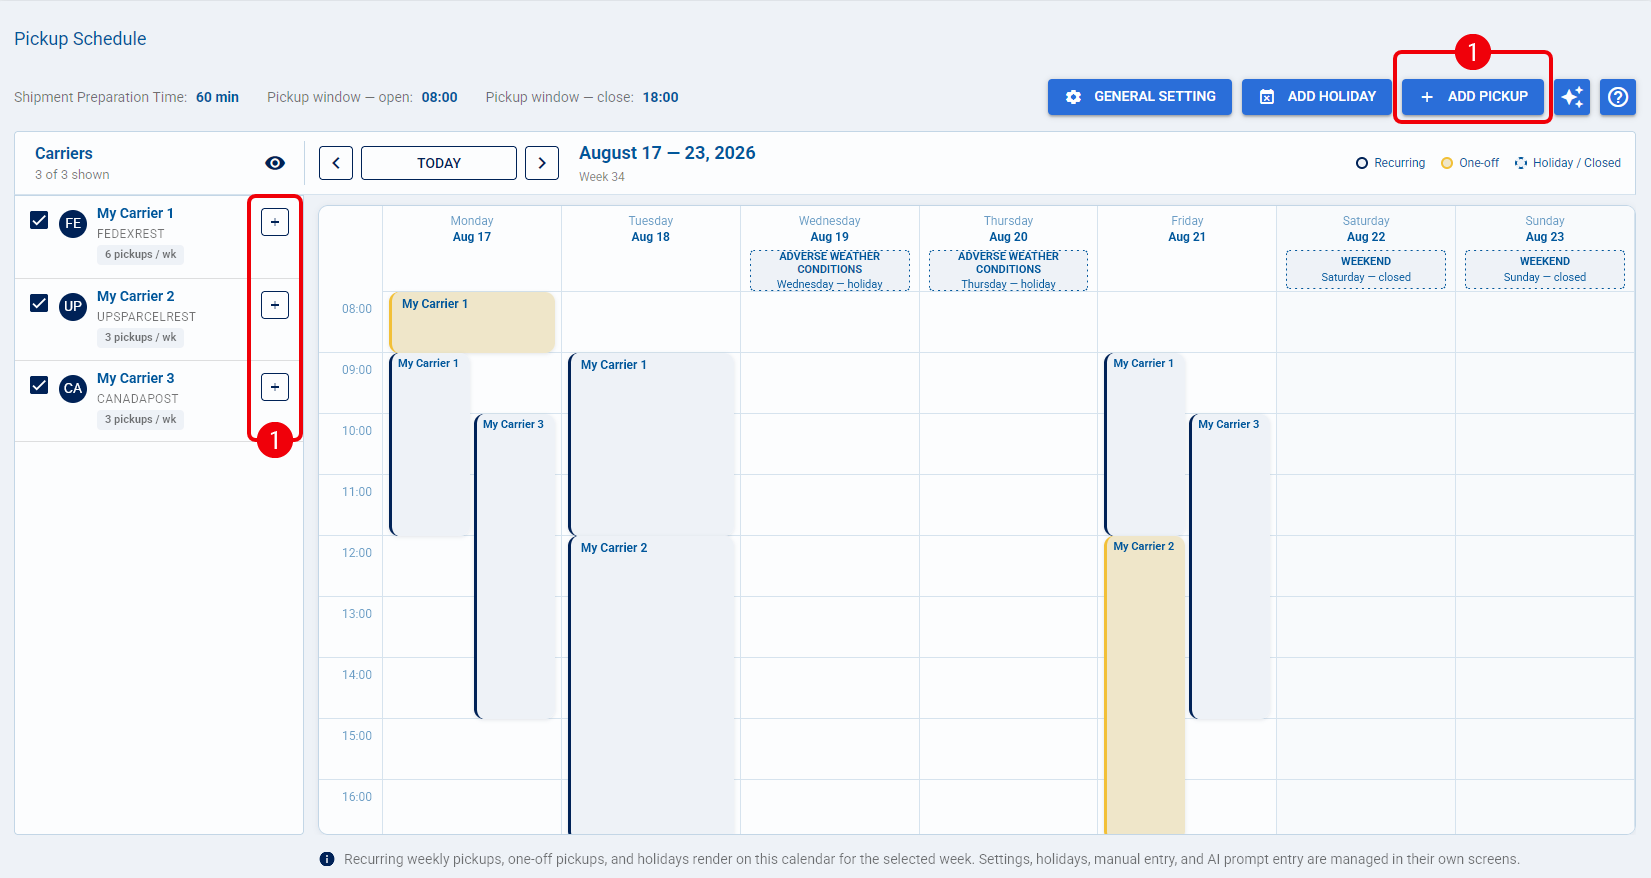
 | Click the Add Pickup button, or click the add icon next to a specific Carrier row. |
 | Ensure the Recurring tab is selected. |
 | Select your active Carrier from the dropdown menu (if not already auto-populated). |
 | Choose the standard weekly Days when the recurring pickup happens. |
For a new pickup, Earliest Arrival and Latest Arrival start blank. Enter Earliest Arrival; Latest Arrival is automatically populated 30 minutes later, up to 23:59. You can edit Latest Arrival as needed.
Once Latest Arrival contains a value, changing Earliest Arrival does not automatically update it, so verify the pickup window before saving. If you clear Latest Arrival, it remains blank until you change Earliest Arrival again, at which point the 30-minute default is applied again.
 | Click Save Pickup to confirm your configuration. |
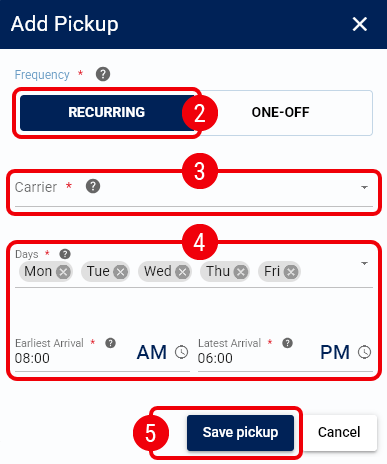
Your recurring pickup schedule is now active and appears on the Calendar for the applicable weeks. Review the calendar to confirm the pickup window, or continue to Creating One-Off Exceptions if you need a date-specific override.
Creating One-Off Exceptions
Use the One-Off feature to create manual overrides for specific calendar days, such as shortened operating hours, extra weekend pickups, or forcing a pickup on a configured Holiday.
| Click the Add Pickup button, or click the add icon next to a specific Carrier row. |
| Ensure the One-Off tab is selected. |
| Select your active Carrier from the dropdown menu (if not already auto-populated). |
| Select the specific calendar Day for this pickup. |
For a new one-off pickup, Earliest Arrival and Latest Arrival start blank. Enter Earliest Arrival; Latest Arrival is automatically populated 30 minutes later, up to 23:59. You can edit Latest Arrival as needed.
Once Latest Arrival contains a value, changing Earliest Arrival does not automatically update it, so verify the pickup window before saving. If you clear Latest Arrival, it remains blank until you change Earliest Arrival again, at which point the 30-minute default is applied again.
| Click Save Pickup to apply the override. |
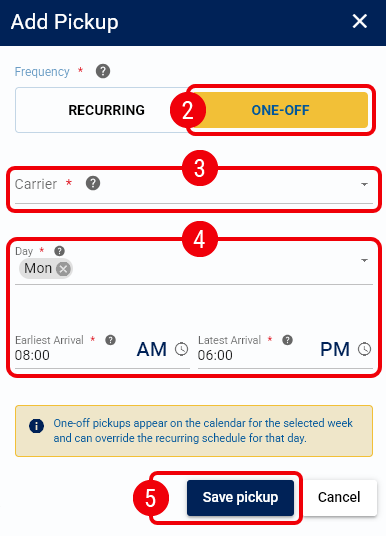
Your one-off pickup is now active for the selected date and appears on the Calendar. Review the calendar to confirm the exception, or use the existing pickup actions if you need to reschedule, cancel, or restore a pickup.
Canceling, Rescheduling, or Restoring Pickups
To modify, remove, or restore an existing pickup on your schedule, click directly on the specific block on your Calendar and choose the appropriate action:
- Reschedule: Update the scheduled times as needed to reschedule, and click Save Pickup.
- Cancel this instance / Cancel one-off pickup: Skip the pickup for this specific date only (the block will turn yellow and appear crossed out).
- Cancel whole series: Delete the entire standard weekly schedule for this specific Carrier.
- Restore recurring pickup: Revert a previously canceled instance back to its standard recurring schedule.
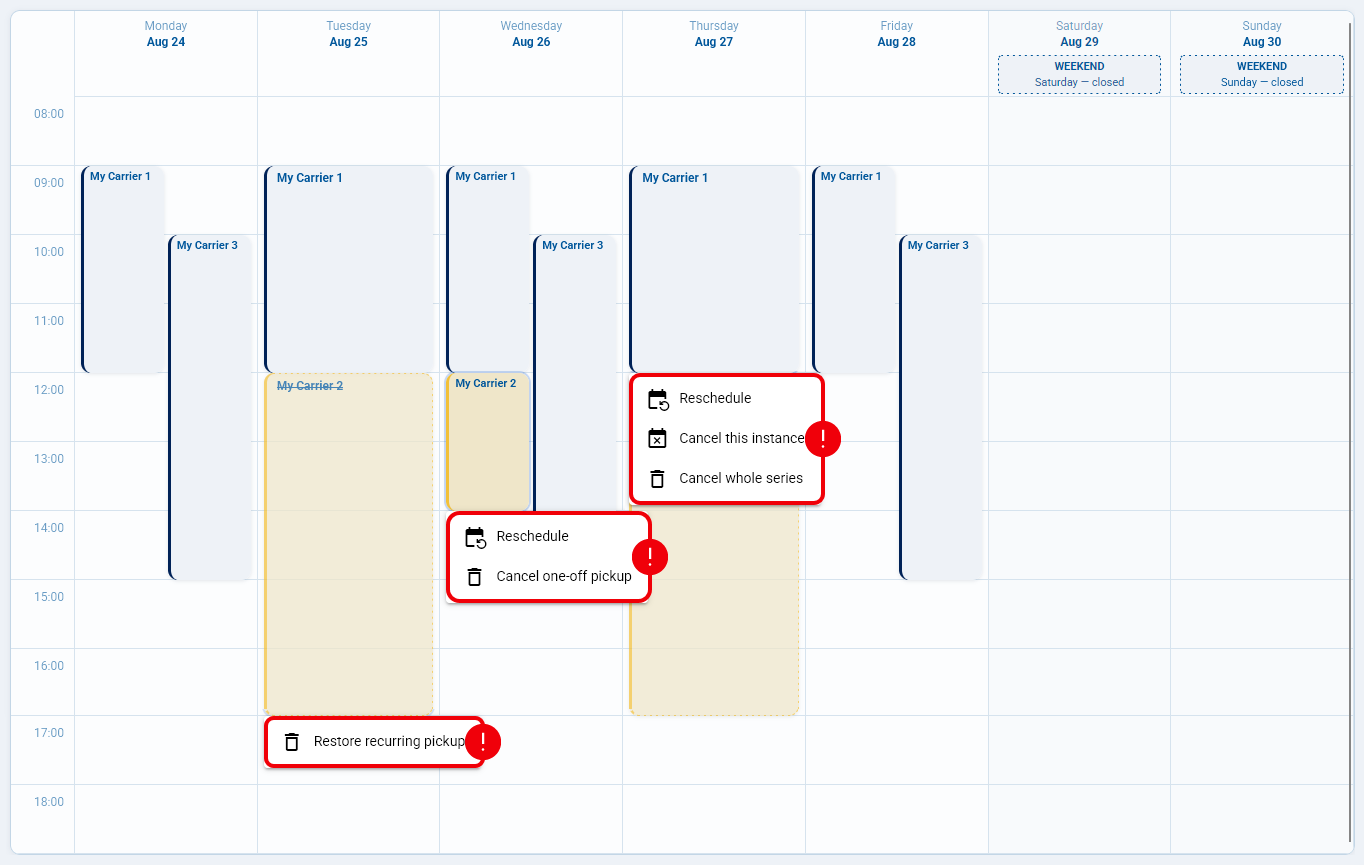
| When selecting either cancellation option, techSHIP will prompt you with a confirmation window. You must click on the Cancel action button to confirm the deletion.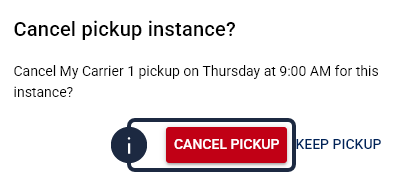 | |
| | ||
Using the AI Assistant for Schedules & Exceptions
You can utilize the AI Assistant prompt on this page to instantly generate bulk or routine schedule changes using natural language (for example, typing "Add a recurring pickup for carrier X every Friday at 4 PM").
For complete instructions and details regarding the availability of this tool, refer to techSHIP AI Assistant: Overview & Availability [Information].