
Custom Lists in techSHIP let you create and maintain reusable sets of text values directly from the application.
This guide explains how to create a Custom List, update its details, manage individual values, and delete a list when you no longer need it.
TABLE OF CONTENTS
- Before You Begin
- Access the Custom Lists Page
- Create a Custom List
- Edit a Custom List
- Delete a Custom List
Before You Begin
Make sure you have the required permissions to create and manage Custom Lists. For information about the required access, refer to techSHIP User Permissions Structure [Information].
 | For detailed conceptual information, refer to Understanding Custom Lists [Information]. | |
| | ||
This guide covers individual list administration only. To add, replace, or download values in bulk, refer to Import and Export Custom List Values [Step-by-Step Guide].
Access the Custom Lists Page
Use the Custom Lists page to create lists and manage existing ones.
From the main navigation menu, click Clients, and then click Custom Lists.
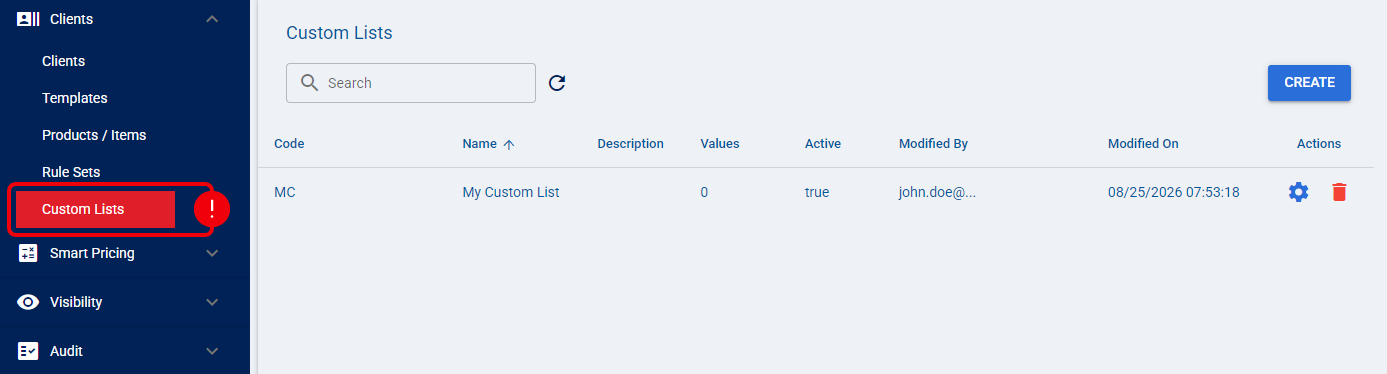
The Custom Lists page opens. You can now create a new list or select an existing Custom List to manage it.
Create a Custom List
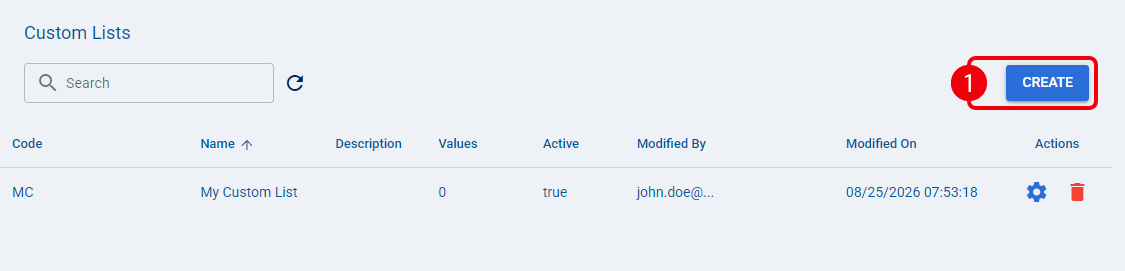
Use Create to define a new Custom List before adding values to it.
 | Click Create. |
 | Complete the Create Custom List dialog, and then click Create: |
- Code: Enter a unique identifier for the list.
- Name: Enter a clear name to identify the list.
- Description: Optionally, describe the intended purpose of the list.
 | Choose the Code carefully. You cannot change the Code after creating the Custom List. | |
| | ||
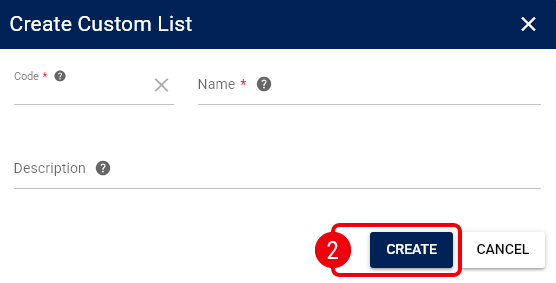
After you click Create, the new Custom List is created with no values. You can now open the list to update its details or add individual values.
Edit a Custom List
You can update the editable properties of an existing Custom List without creating a new list.
| Locate the Custom List you want to modify, and click its settings action. |
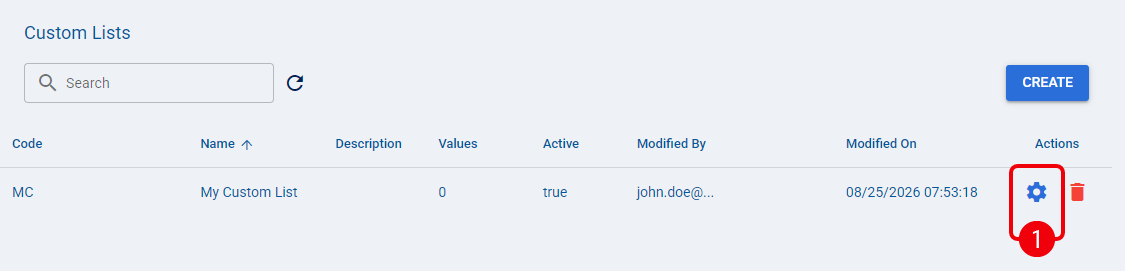
| Update the Custom List details as needed, and then click Save: |
- Code: Displays the unique list identifier and cannot be changed.
- Name: Enter a clear name to identify the list.
- Description: Optionally, describe the intended purpose of the list.
- Active: Select to make the list active, or clear to make it inactive.

After you click Save, techSHIP applies the updated list details. You can continue by managing the list's individual values.
Manage Individual Values
Use the Values tab to find, add, edit, or delete individual entries in a Custom List.
Find a Value
Use Search to find an existing value in the list.
Enter the value you want to find in Search, and review the matching entries.
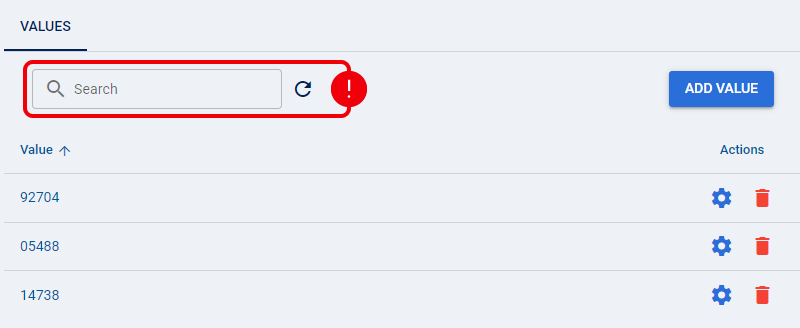
After you locate the required value, you can edit or delete it as needed.
Add a Value
Use Add Value to insert one value manually.
| Click Add Value. |
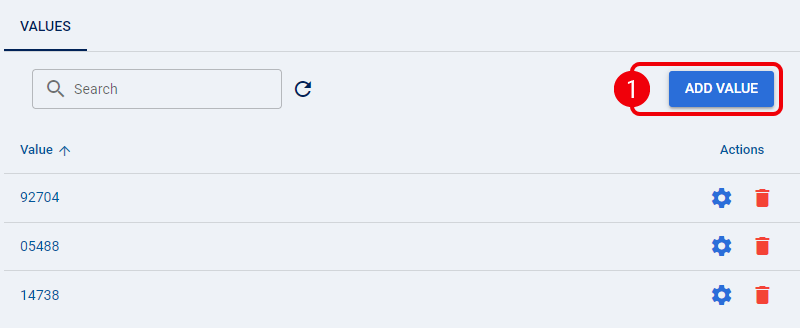
| Complete the Add Value dialog, and then click Save: |
- Value: Enter the value you want to add to the list.
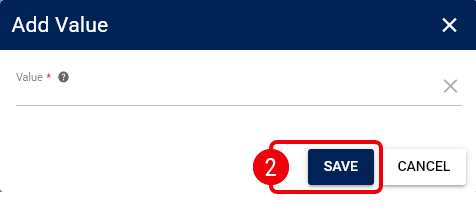
After you click Save, the new value appears in the Custom List. You can add another value or continue managing existing entries.
Edit a Value
Use the row's settings action to modify an existing value.
| Locate the value you want to update, and click its settings action. |
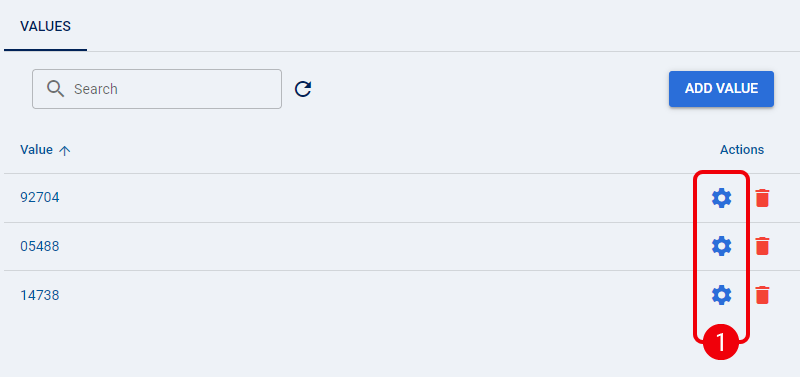
| Update the Edit Value dialog, and then click Save: |
- Value: Update the existing value as needed.
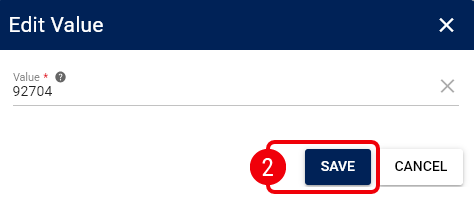
After you click Save, techSHIP replaces the previous entry with the updated value. You can continue reviewing or managing the remaining values.
Delete a Value
Use the row's delete action when an individual value is no longer required.
Locate the value you want to remove, and click its delete action.
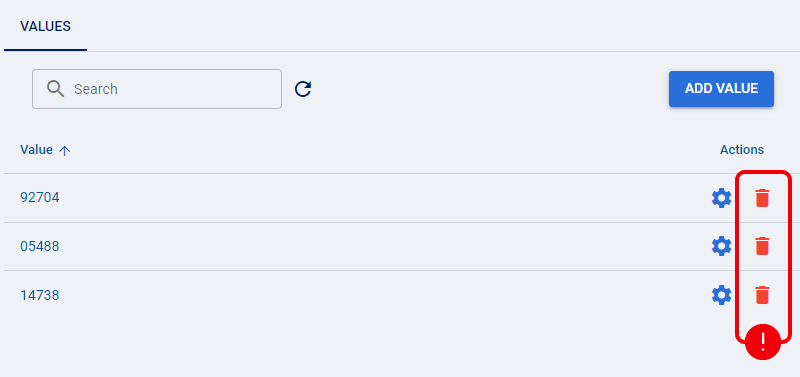
After the deletion succeeds, the value is removed from the Custom List. You can continue managing the remaining values or return to the list details.
Delete a Custom List
You can delete a Custom List when you no longer need it and no supported configuration prevents its removal.
Locate the Custom List you want to remove, and click its delete action.
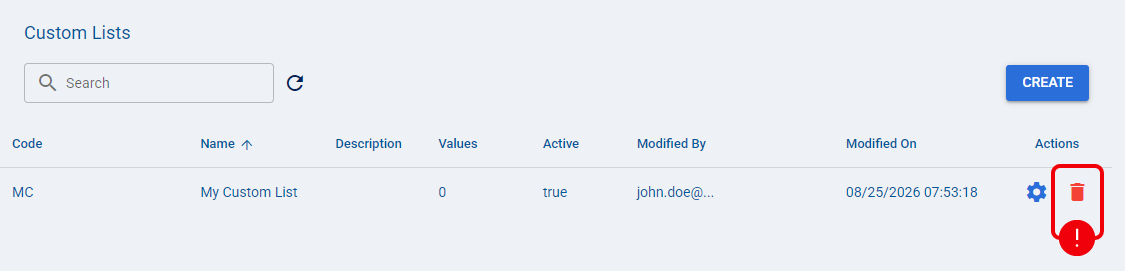
If techSHIP blocks the deletion because the list is referenced by another configuration, review the identified dependencies before trying again. For more information about Custom List dependencies, refer to Understanding Custom Lists [Information].
After the deletion succeeds, the Custom List is removed. You can return to the Custom Lists page to manage another list or use Create to create a new one.