
You can use Zones & Areas in techSHIP to map geographic regions to shipping transit zones.
This guide covers creating and maintaining these shared configurations for Custom Pricing Tables and Markup Profiles.
 | Use with Markup Profiles: You can configure Zones & Areas for use with Markup Profiles without creating a Custom Pricing Table. For detailed conceptual information and advanced configuration, refer to Understanding Markup Profiles in techSHIP [Guide]. | |
| | ||
TABLE OF CONTENTS
Configure Zones & Areas
| You can skip manual Zones & Areas configuration for supported Carriers by selecting predefined [SYSTEM] mappings in the Zone & Area field when creating a Service Level within a Custom Pricing Table or configuring a Service Group within a Markup Profile. In the screenshot below, you can see the Custom Pricing Table example.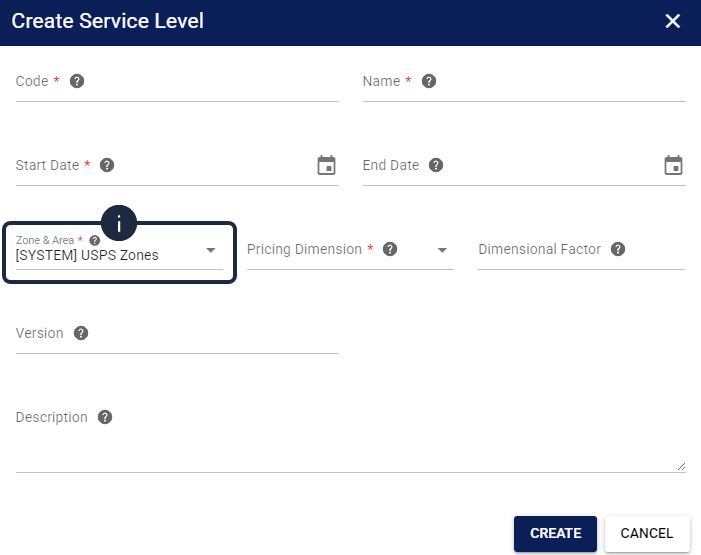 | |
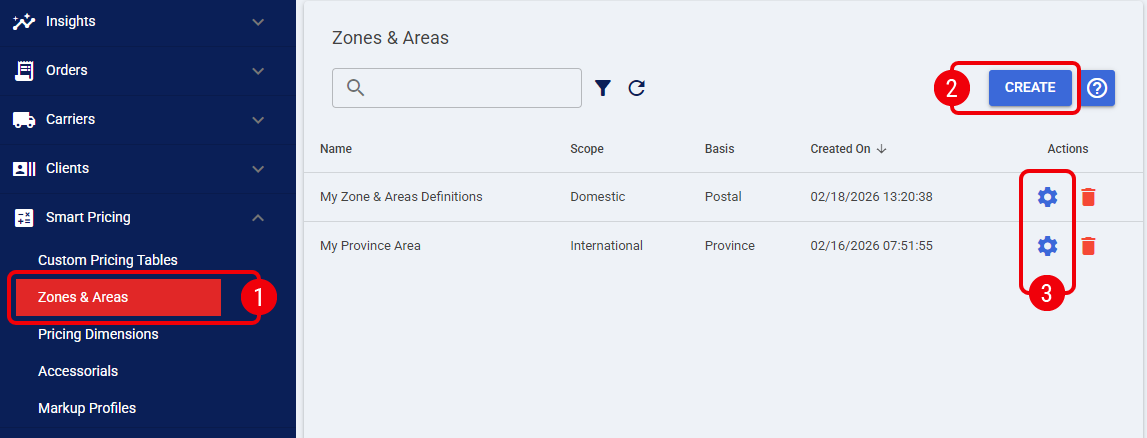
 | Click Zones & Areas from the left menu under the Smart Pricing category. |
 | Press Create, complete the required fields including its fundamental geographic Scope (e.g., Domestic or International), and save the record. |
 | Click the Edit icon on the new record to configure its mappings. |
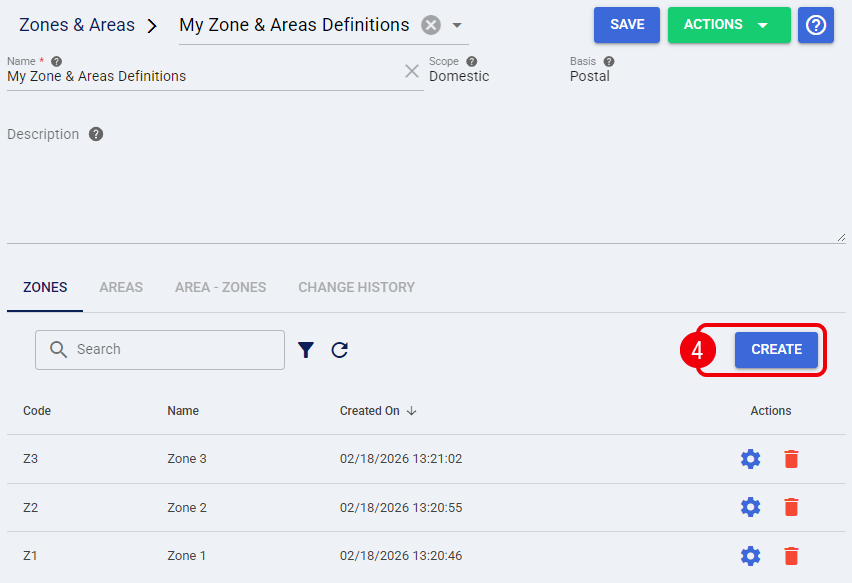
 | Under the Zones tab, press Create to define the specific routing identifiers (e.g., Zone 1, Zone 2) used by your carrier. |
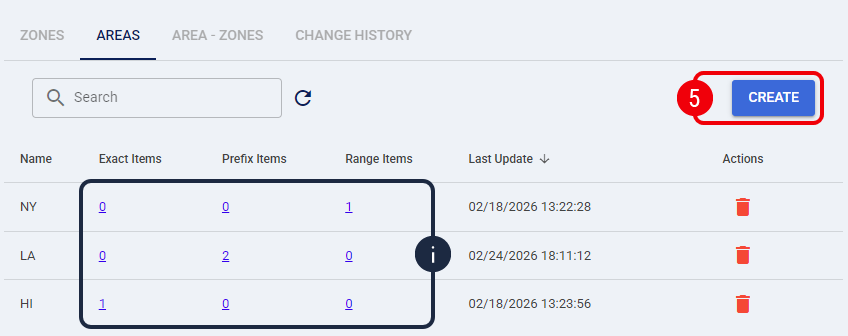
 | Under the Areas tab, press Create to add a new area. |
| To edit the physical geographies for an area, click directly on the values within the Exact Items, Prefix Items, or Range Items columns to perform an inline edit. | |
 | Under the Area - Zones tab, map the transit routes by assigning a Zone to shipments traveling from an Origin Area to a Destination Area. |
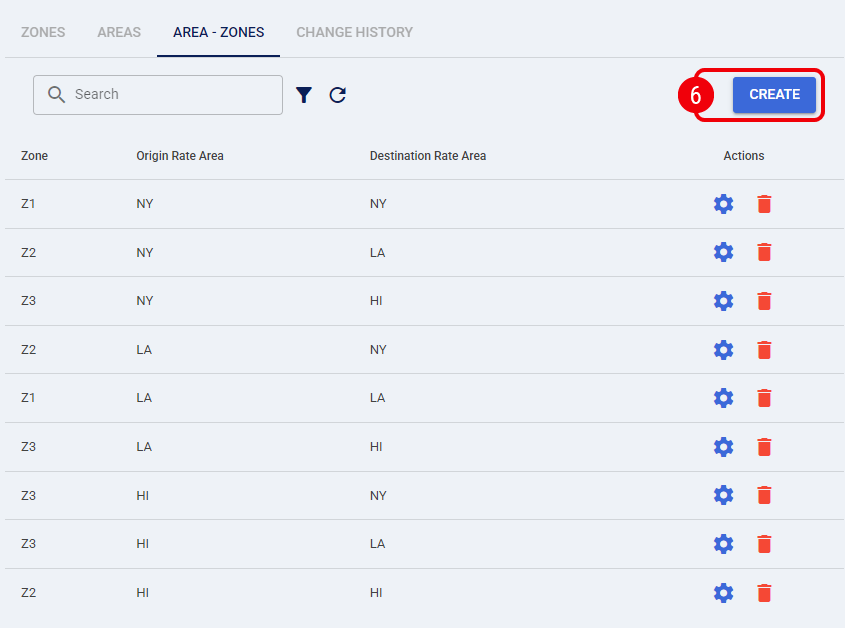
| Toggle the Is Mirrored option when creating an Area - Zone mapping to simultaneously generate the exact reverse route mapping.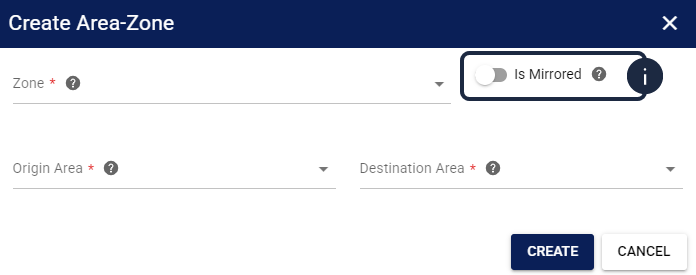 | |
| To bypass manual UI entry, you can manage geographic mappings using the Export and Import functions under the Actions menu. Importing a spreadsheet completely replaces all existing Areas and Area-Zones data.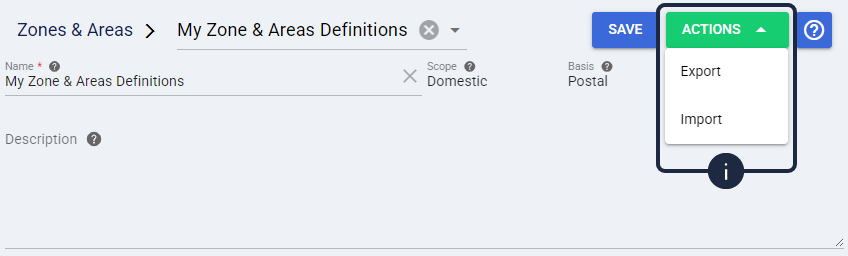 | |
Your geographic transit routes are now mapped and ready to use with a Custom Pricing Table or Markup Profile. Review your Zones, Areas, and Area - Zones before continuing with your pricing or markup setup.
Continue Your Configuration
To use your Zone & Area configuration in a Custom Pricing Table, continue with Creating Service Levels in Mastering Smart Pricing in techSHIP [Guide].
To use your configuration in a Markup Profile, continue with How to Configure and Manage Markup Profiles in techSHIP [Step-by-Step Guide].
To review recorded changes, open the Change History tab. For instructions on accessing and interpreting these records, refer to How to Review Change History Logs for Supported Entities [Step-by-Step Guide].