
You can create and maintain Handling Groups in techSHIP to organize Items according to the cartonization configuration required at your Location. This guide covers how to create, edit, activate, deactivate, and delete Handling Groups and review their saved configuration.
 | Before proceeding, make sure to read and understand How to Use Cartonization [Guide]. | |
| | ||
| Cartonization must be enabled for the Location for Settings > Cartonization to be available. To create or modify Handling Groups, you need appropriate permissions. Review your access level in the techSHIP User Permissions Structure [Information]. | |
| | ||
TABLE OF CONTENTS
- Access Handling Groups
- Create a Handling Group
- Edit a Handling Group
- Activate or Deactivate a Handling Group
- Delete a Handling Group
- Next Step
Access Handling Groups
To access the Handling Groups configuration, open Settings > Cartonization, and then select the Handling Groups tab.
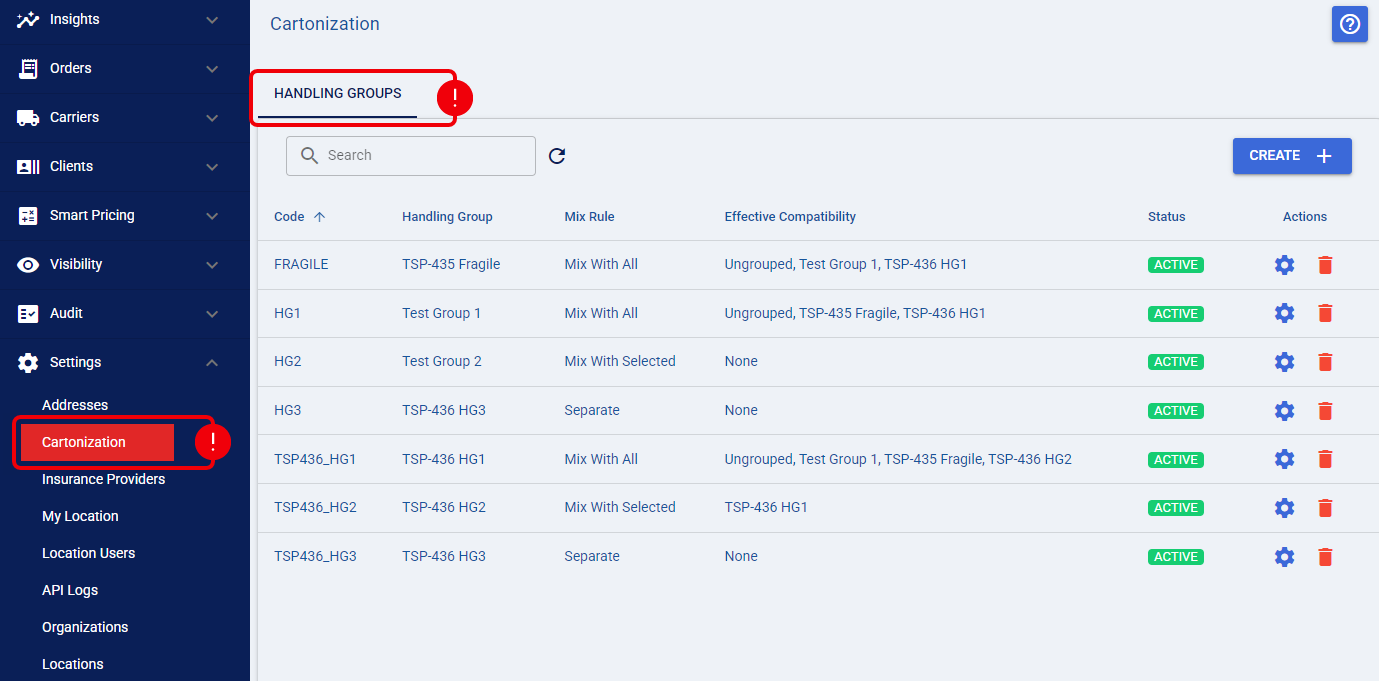
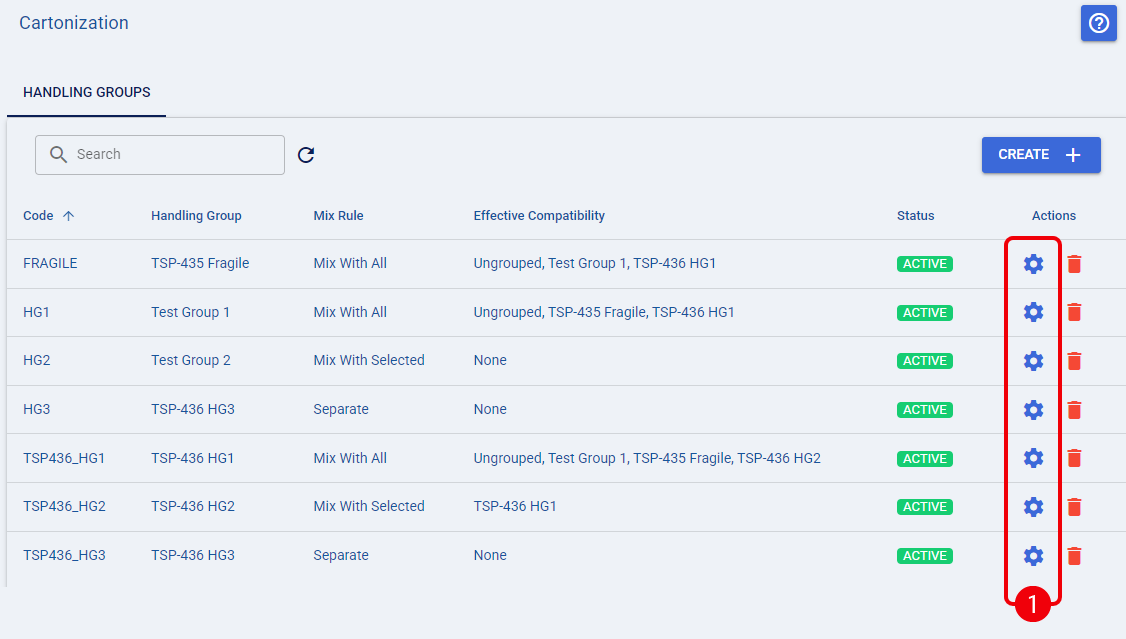
You can now review the Handling Groups configured for the selected Location, including their Mix Rule, status, and Effective Compatibility.
Create a Handling Group
To create a new Handling Group:
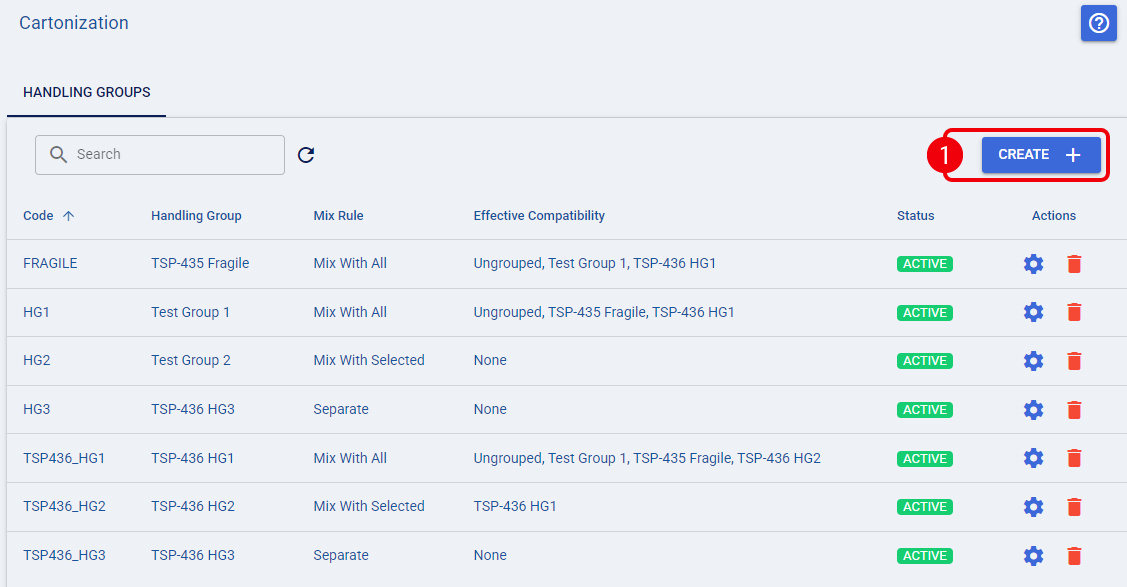
 | Click Create. |
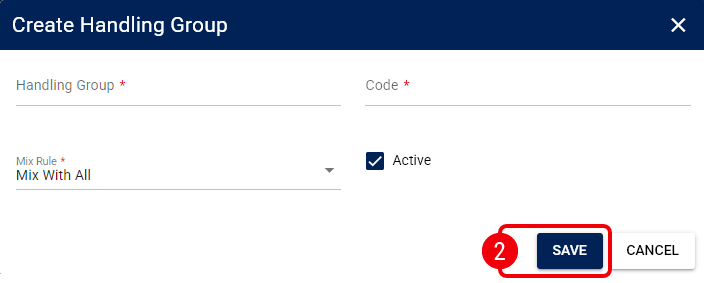
 | In the Create Handling Group dialog, complete the applicable fields and click Save: |
- Handling Group: Enter a unique name for the group.
- Code: Enter a unique code for the group. You cannot change the Code after creating the group, and you cannot use UNGROUPED as the code.
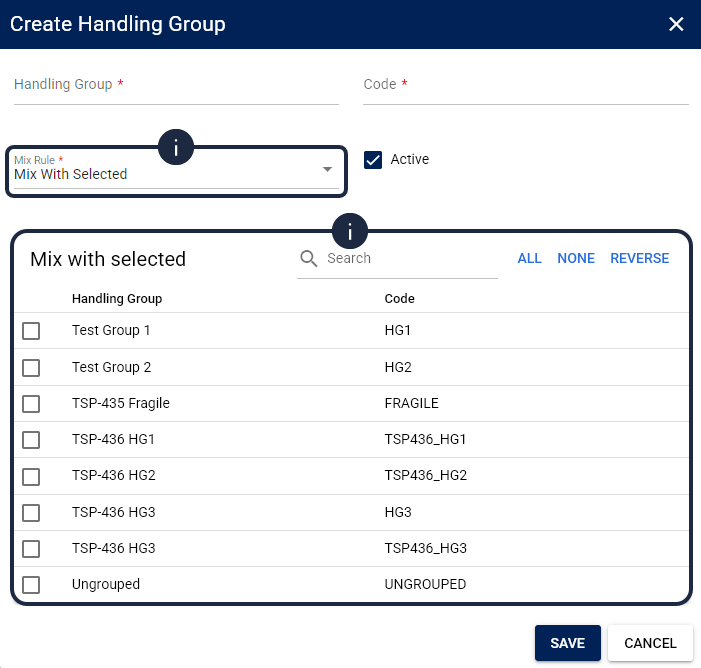
- Mix Rule: Select the appropriate rule. New groups default to Mix with all. You can also select Mix with selected or Separate.
- Mix with selected: When you select Mix with selected, choose the applicable Handling Groups from the displayed list. You can also select Ungrouped when required.
- Active: Leave Active selected if you want the Handling Group to be available for use immediately.
| When configuring Mix with selected, you can use All, None, and Reverse to manage the displayed selections. All and Reverse apply to the currently filtered entries, while None clears all selections. | |
| | ||
 | Handling Group names and codes must be unique within the Location. techSHIP prevents you from saving a duplicate name or code. | |
| | ||
After you save the group, it appears in the Handling Groups list. Review its Effective Compatibility, and then proceed to assign the Handling Group to the applicable Items using How to Manually Set Up Items for a Client [Step-by-Step Guide].
Edit a Handling Group
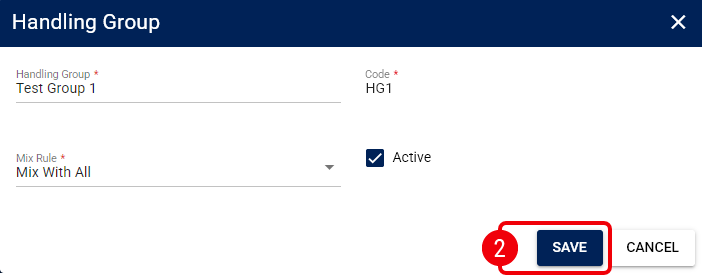
You can update the Handling Group name, Mix Rule, selected groups, and Active status after creation.
| Locate the required Handling Group, and click its Edit action. |
| In the Handling Group dialog, update the required fields and click Save. The existing Code remains read-only and cannot be changed. |
| If you change Mix with selected to another Mix Rule, the previously selected entries are cleared. Review How to Use Cartonization [Guide] before changing an existing compatibility configuration if you need to understand its broader effect. | |
| | ||
After saving, review the updated row and its Effective Compatibility to verify that the configuration reflects your intended changes. You can then update any related Item assignments if required.
Activate or Deactivate a Handling Group
You can use the Active setting to control whether a Handling Group remains available for new configuration.
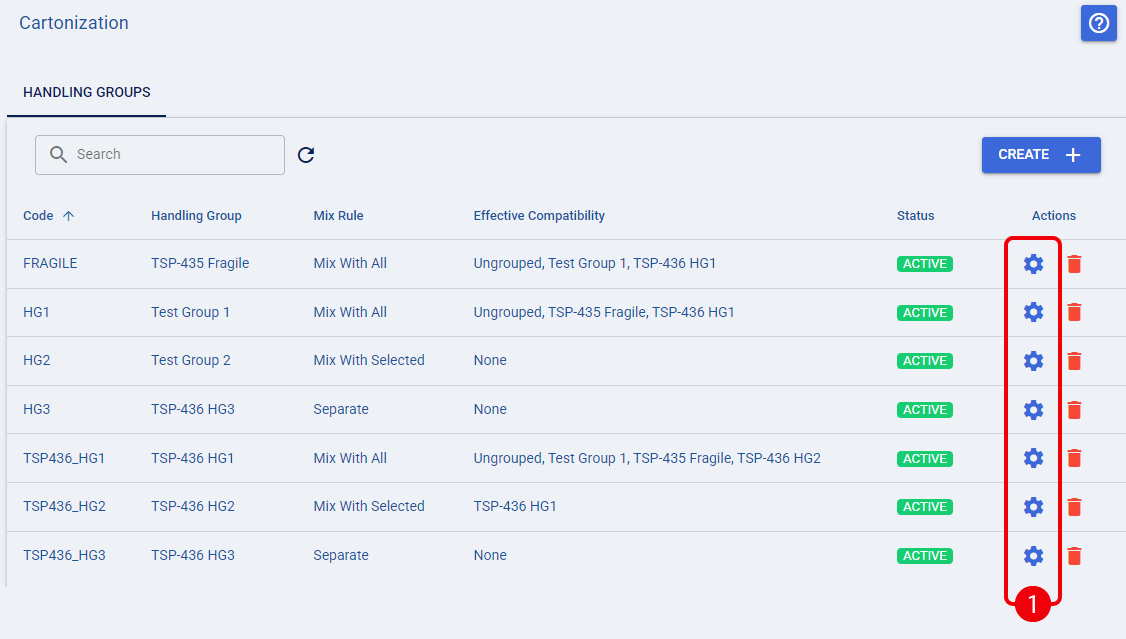
| Locate the required Handling Group, and click its Edit action. |
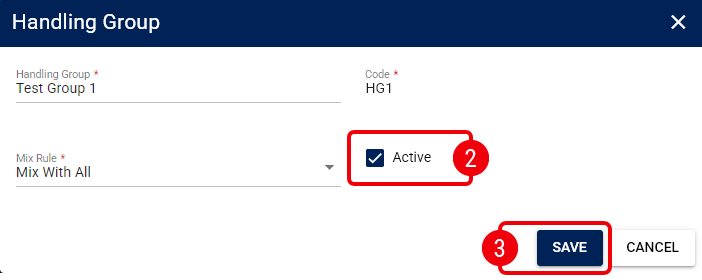
| In the dialog, clear Active to deactivate the group or select Active to reactivate it. |
 | Click Save. |
| Deactivating a Handling Group does not delete it. Existing references can remain, while the inactive group is not available for new selections. For lifecycle and cartonization implications, refer to How to Use Cartonization [Guide]. | |
| | ||
After saving, the Handling Groups list reflects the updated status. An inactive group displays Inactive for its Effective Compatibility; after reactivation, review the list again to verify its current configuration.
Delete a Handling Group
Delete a Handling Group only when you no longer need the configuration.
| Deletion is permanent. If the Handling Group is assigned to one or more Items, techSHIP blocks the deletion; deactivate the group instead. For detailed lifecycle behavior, refer to How to Use Cartonization [Guide]. | |
| | ||
| Locate the required Handling Group and click its Delete action. |
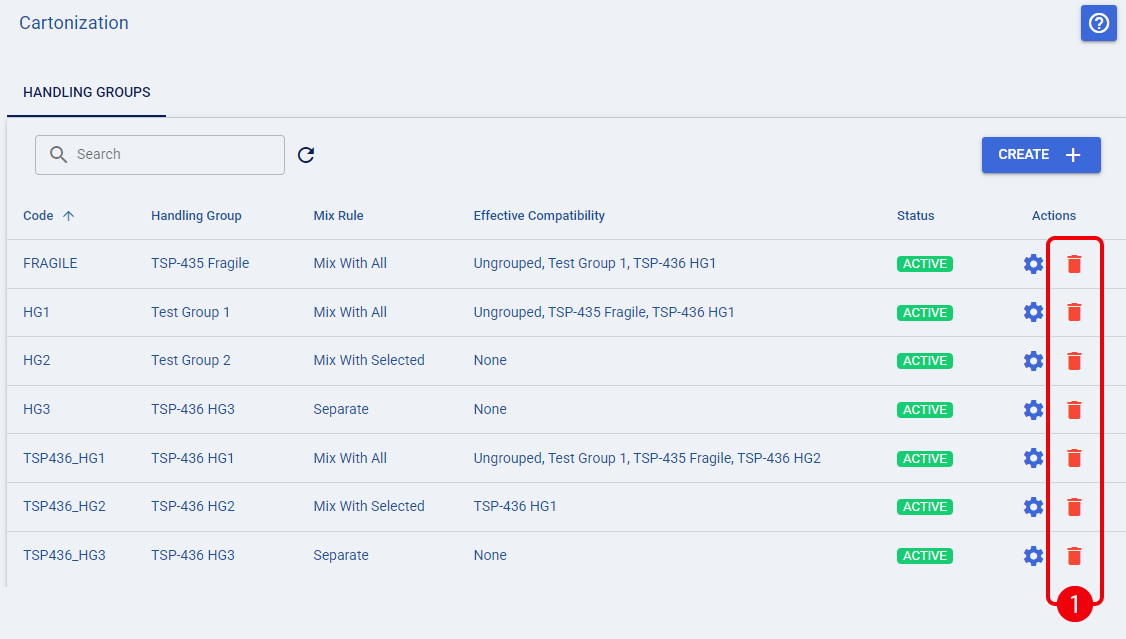
| Click OK to confirm the deletion in the displayed dialog. |
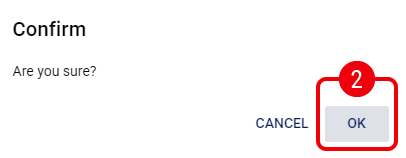
After the deletion is confirmed, the Handling Group no longer appears in the list. Review the remaining Handling Groups and their Effective Compatibility before making additional configuration changes.
Next Step
After you create the required Handling Groups, assign them to the applicable Items using How to Manually Set Up Items for a Client [Step-by-Step Guide].
For the complete Cartonization workflow, compatibility behavior, and advanced configuration, refer to How to Use Cartonization [Guide].